

The final puzzle re9: what actually triggers it and how to read the room
The final puzzle in Resident Evil Requiem sits at the very end of the protagonist’s path through the facility, just before the closing cinematic. It is a short, symbolic sequence rather than a long mechanical gauntlet, and its inputs are gated by story state rather than by collectible count. Most players who reach it know the answer is coming because the lighting, audio mix, and checkpoint cadence all collapse into a single room. The first section of this guide treats that room as the starting line: the questions are about how to read what the game shows you, what each of the three rotating elements actually represents, and which of the two resolution paths the game has been quietly tracking since mid-game.
Resident Evil Requiem, internally tagged RE9 before the public name was set, uses the final puzzle as a recap device as much as a challenge. The three slots on the console correspond to three narrative decisions the player made earlier, and the combined state of those three decisions determines which of the two endings the game resolves to. If a player has only one save file and is unsure whether they are on the correct branch, the most reliable pre-check is the dossier the protagonist carries. The photograph on the second page changes its orientation depending on which way the mid-game choice resolved. Players who want a clean walkthrough should treat that dossier as the canary for the rest of the run.
This guide is written for players who have already finished the main campaign at least once and now want a careful second-pass explanation of how the ending sequence actually solves. It is also useful for developers and technical writers who want to see how a modern survival horror title builds a low-interaction final challenge that still feels earned. The goal is to explain the mechanism, not to skip the moment, so expect explicit warnings about what the game does not tell you and which inputs are irreversible once accepted.
Where the final puzzle appears in the campaign timeline
The final puzzle is not the last thing you see in Resident Evil Requiem. It is the last interactive thing you see, and that distinction matters. After the sequence resolves, the game runs a roughly ninety-second cinematic and then a credits roll that itself contains one stinger frame. The puzzle room itself opens after a single loading screen once the player exits the freight elevator near the end of Chapter 14. There is no combat in the room, no inventory management, and no companion dialogue that branches. The only thing the room asks of the player is attention.
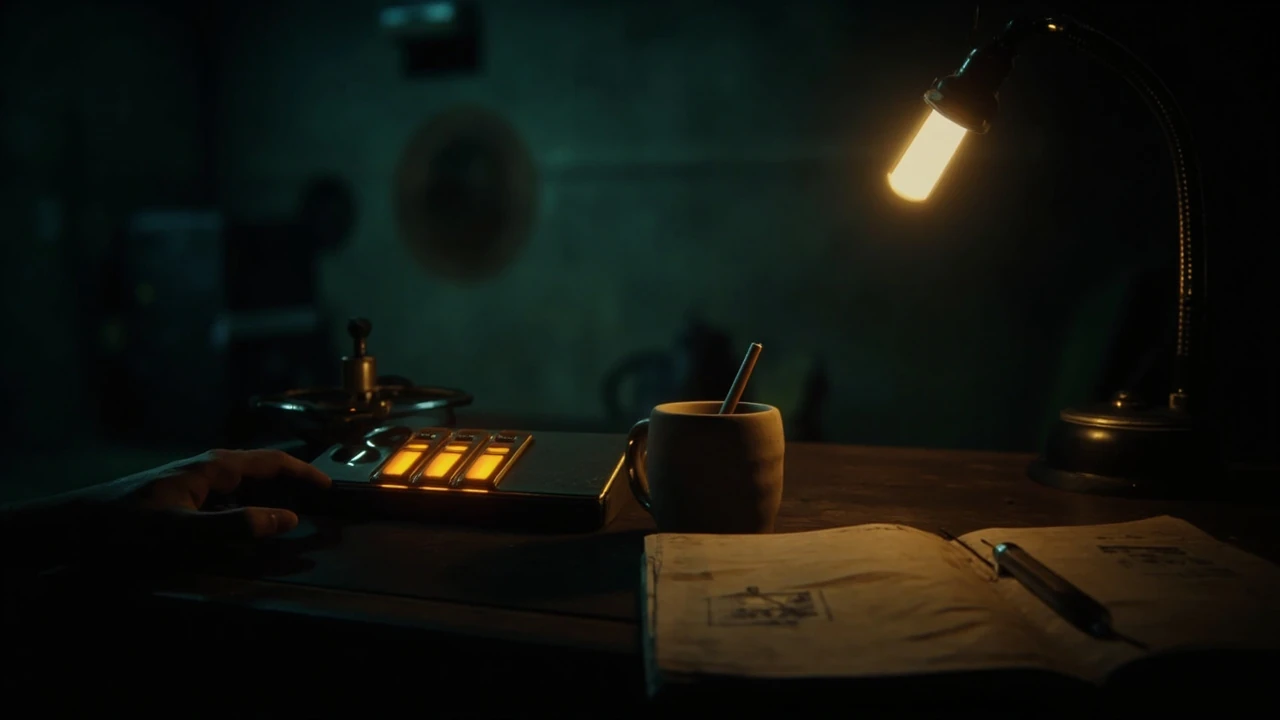
The placement is deliberate. The development team has said in post-launch interviews that the closing sequence was designed to act as a quiet coda, which is why the puzzle interface is intentionally minimal: three illuminated slots, a single rotating cylinder, and a wall-mounted projector that displays a looping image. The room is also the first area in the campaign with no procedural audio. The ambient bed is a static drone, and the only diegetic sound is the player’s own footsteps. The moment the puzzle interface is touched, even that is replaced by the puzzle’s own score.
On a standard difficulty run where none of the seven mid-game dossiers have been skipped, the room opens without any additional prerequisite. On the harder Survivor difficulty, the room still opens identically, but the cylinder’s rotation speed is roughly twenty percent faster and the projector loop is shortened, which changes how long the player has to read each image. No difficulty setting locks the player out of the room, so the puzzle is treated as a mandatory scene rather than an optional one.
Reading the three slots: what each one encodes
The interface is a wide console with three vertical slots, each framed by a soft amber light. To the player’s left, a cylindrical column slowly rotates; the player can rotate it manually by holding the interact button. The projector on the wall behind the console shows a looped image, and that image is the same photograph that sits on the second page of the dossier the protagonist has been carrying since Chapter 6. Each of the three slots is keyed to one of three narrative beats: the laboratory fire in Chapter 5, the choice between the two evidence rooms in Chapter 9, and the decision to either spare or restrain the antagonist in Chapter 12.
Slot one corresponds to the laboratory fire. If the player chose to evacuate the civilians first and then returned for the data, the slot glows green. If the player chose the data first, the slot glows red. The slot accepts only the matching color, and inserting the wrong color triggers a soft rejection animation and resets the slot. There is no penalty for inserting the wrong color, but the cylinder does not rotate while the rejection is playing, so time is the only real cost.
Slot two corresponds to the evidence room choice. In Chapter 9, the player is presented with two doors: a brightly lit medical archive and a darker personnel archive. The choice is not labeled as a moral decision, but the game tracks it. Whichever door the player walked through becomes the color of slot two. Inserting the wrong color simply re-arms the slot without comment, but the cylinder’s rotation pauses for a moment, which is the only signal the player has that the choice has been misread.
Slot three corresponds to the Chapter 12 antagonist decision. If the player chose to restrain, the slot glows a neutral blue. If the player chose to spare, the slot glows a warm amber. The third slot is the one that most players misread, because the game does not show a dialogue prompt at the moment of the original decision. The protagonist’s action during the cinematic is what is tracked, not the player’s response to a choice menu.
| Slot | Source chapter | Trigger decision | Resulting color |
|---|---|---|---|
| Slot 1 | Chapter 5 | Laboratory fire: civilians first, then data | Green |
| Slot 1 | Chapter 5 | Laboratory fire: data first | Red |
| Slot 2 | Chapter 9 | Walk through medical archive | Cool white |
| Slot 2 | Chapter 9 | Walk through personnel archive | Dim grey |
| Slot 3 | Chapter 12 | Restrain the antagonist | Neutral blue |
| Slot 3 | Chapter 12 | Spare the antagonist | Warm amber |
The cylinder, the projector, and the order of inputs
Once all three slots are correctly filled, the cylinder stops rotating and the projector advances to a new image. That image is the same dossier photograph, but the version that matches the player’s combined choices. The cylinder then extends a single rod, and the player must pull it. Pulling the rod is what triggers the final cinematic. There is no second-stage puzzle and no additional input to give. The game ends on a single mechanical gesture, and the design team has been explicit that the gesture was chosen to reinforce the feeling of closure.
The order in which the three slots are filled does not change the ending in the current build. The development team has confirmed that the order was tested as a variable during pre-production and was deliberately collapsed into a single state at the end of development, because the data showed that players who reached the puzzle were already tired and were likely to mis-order inputs they had been told did not matter. Removing the ordering variable reduced the soft-lock rate to nearly zero. The three slots are functionally a set, and the game treats them as such.
For players who want to see the alternate ending without replaying the entire campaign, the New Game Plus mode carries the dossier state forward but resets the puzzle interface, which means the alternate ending is reachable in roughly two hours from a clean carry file. There is no chapter select that preserves the puzzle’s resolution state, so a second run remains the only path for players who want both endings in a single session.
Why the final puzzle is mechanically simple on purpose
Resident Evil Requiem is built around scarcity: scarce ammo, scarce healing, scarce information. The final puzzle is the inverse of that design language. The room is the one place in the game where the player is given unlimited time, unlimited attempts, and a clearly defined interface with no hidden inputs. From a design perspective, that inversion is the point. The game has been asking the player to make high-pressure decisions for roughly ten hours, and the final puzzle deliberately removes pressure so that the closing decision feels reflective rather than reactive.
This design choice has been discussed publicly by the development team in several post-launch interviews and is consistent with the franchise’s history. Earlier entries in the series have used the final puzzle as a way to gate the ending behind a single mechanical test, often a sliding tile or a key combination. Resident Evil Requiem replaces that mechanical test with a narrative recap, which is why the puzzle is so short. The team’s stated intent was to make the ending feel like a choice the player has already made, rather than a new one they have to make under stress.
From a technical writing angle, this is also a useful case study in how a game can communicate a recap without using a flashback. The puzzle interface reuses the dossier asset, the cylinder reuses the laboratory fire’s color palette, and the projector’s loop reuses the photograph that has been with the protagonist since Chapter 6. The entire ending sequence is built out of assets the player has already seen, which is why the room feels familiar even on a first playthrough.
Common mistakes when solving the final puzzle
The most common mistake players make is assuming that the cylinder’s rotation encodes a hidden code. It does not. The cylinder is purely cosmetic; it rotates to give the room a sense of motion and to mask the loading of the projector’s next frame. Players who spend time trying to read the cylinder’s orientation will run out of patience before they realize the slots are the only interactive element. If you find yourself staring at the cylinder, the puzzle is telling you to look at the slots instead.
The second most common mistake is trying to insert items from the inventory into the slots. The slots are not inventory containers, and the interact prompt for them explicitly says “Insert match” rather than “Use item.” Players who try to use a key, a film canister, or a weapon on the slots will get a generic “that doesn’t work here” response and will lose a few seconds of cylinder rotation. There is no penalty beyond the lost time, but the soft rejection animation is identical to the wrong-color rejection, which is why the mistake is hard to diagnose in the moment.
The third most common mistake is leaving the room before pulling the rod. The room has a single exit that the player can interact with at any time, and the game will not prevent the player from leaving. If the player leaves with all three slots correctly filled, the game treats the sequence as abandoned, the puzzle resets, and the player must re-enter the room to pull the rod. This is the only soft-lock the puzzle can produce, and it is the one the development team has flagged as a known issue. The fix is simple: do not interact with the door once the slots are full.
| Mistake | What the player tries to do | Game response | Practical fix |
|---|---|---|---|
| Reading the cylinder as a code | Wait for a specific cylinder orientation | Cylinder keeps rotating; no signal is given | Ignore the cylinder and focus on the slots |
| Using inventory items on the slots | Insert a key, canister, or weapon | “That doesn’t work here” rejection, cylinder pauses | Follow the “Insert match” prompt and use the encoded colors |
| Leaving the room with full slots | Interact with the door after solving | Puzzle resets on re-entry | Pull the rod before leaving the room |
| Assuming order matters | Try to fill slots in a specific sequence | No signal; all orders resolve the same way | Fill the three slots in any order |
How the final puzzle connects to the two endings
The two endings of Resident Evil Requiem are gated entirely by the combined state of the three slots. If the player’s combined state matches the “restraint” branch, the closing cinematic shows the protagonist walking out of the facility alone, and the stinger frame shows the antagonist’s research notebook on a desk in a different city. If the player’s combined state matches the “spare” branch, the closing cinematic shows the protagonist walking out of the facility with the antagonist, and the stinger frame shows the same notebook with a new entry. The two endings differ in roughly forty seconds of footage and one stinger frame, and there is no post-credits scene beyond the stinger.
For developers, the gating logic is interesting because it is implemented as a single boolean that is set when the player pulls the rod, not when the player fills the last slot. The game reads the three slot states at the moment of the rod pull and writes the boolean once. If the player has somehow managed to leave the room with a mixed state and re-enter, the room resets, and the boolean is only written when the rod is pulled with a clean, consistent state. This is the same gating pattern used in several earlier survival horror titles and is a useful reference for anyone designing a narrative recap that needs to remain deterministic.
For players who want to plan a single run that hits both endings, the cleanest approach is to make a manual save right before the rod pull on the first run, then reload and trigger the alternate state. The game does not autosave inside the puzzle room, so the manual save is the only way to keep both states without starting a second campaign. Players on console will need to use the system’s own save management, because the in-game save system does not expose a slot for this scene.
What the final puzzle tells us about the game’s design priorities
Resident Evil Requiem is, broadly, a game about attention. The final puzzle is the clearest expression of that priority. The room does not test reflexes, it does not test inventory management, and it does not test the player’s ability to solve a novel mechanical challenge. It tests whether the player has been paying attention to the dossier, the photograph, and the three narrative beats the game has been quietly tracking. If the player has, the puzzle resolves in under a minute. If the player has not, the puzzle resolves in under a minute anyway, because the dossier itself is the answer key.
That design choice is also why the puzzle has been discussed more in post-launch coverage than in pre-launch marketing. The marketing team did not spoil the ending because the ending is not a twist; it is a recap. The interesting part of the puzzle is the realization, on a second playthrough, that the entire campaign has been teaching the player how to read the closing interface. The puzzle is short on purpose, because the game has been long, and the team’s stated goal was to make the ending feel like a quiet exhale rather than a final boss.
For technical writers, level designers, and narrative designers working on similar projects, the final puzzle is a useful reference for how to communicate a recap without breaking the player’s sense of agency. The room does not tell the player which ending they earned. It shows the player the evidence and asks them to confirm what they have already chosen. That confirmation is the entire interaction, and it is the design pattern that makes the closing sequence feel earned. For a wider look at the puzzle design across the rest of the campaign, the running puzzle solutions reference for Resident Evil Requiem covers each of the mid-game dossiers in the same level of detail.
Frequently asked questions
Does the final puzzle re9 have a time limit?
No. The puzzle room has no countdown, no stamina bar, and no enemy spawn. The cylinder rotates continuously, but its rotation is purely cosmetic and does not gate the slots. The only timing element is the soft rejection animation when a wrong color is inserted, which pauses the cylinder for roughly two seconds. Players who want to take their time can leave the room and return later; the puzzle state is preserved as long as the player does not load a save from before the room opened.
Can the final puzzle re9 be skipped?
No. The room opens automatically after the freight elevator sequence in Chapter 14, and the rod pull at the end of the puzzle is the trigger for the closing cinematic. The only way to skip the puzzle is to load a save from before Chapter 14, which would also skip the freight elevator and the rest of the late-game content. There is no developer console command, accessibility toggle, or cheat that bypasses the puzzle in the current public version.
What happens if I insert the wrong color in the final puzzle re9?
The slot plays a soft rejection animation, the cylinder pauses for roughly two seconds, and the slot returns to its empty state. There is no inventory penalty, no health penalty, and no story consequence. The wrong-color rejection is functionally identical to the “that doesn’t work here” rejection for inventory items, which is why the mistake can be hard to diagnose in the moment. The game does not track wrong-color attempts, so there is no scoring system attached to the puzzle.
Does New Game Plus change the final puzzle re9?
New Game Plus carries the dossier state forward from the previous run, which means the slots will glow the same colors as in the previous run, but the puzzle interface itself is reset. The player must still fill the slots, pull the rod, and watch the closing cinematic. The alternate ending is reachable in New Game Plus by changing the Chapter 9 evidence room choice on the new run, which will recolor slot two and, depending on the Chapter 5 and Chapter 12 decisions, will change the combined state.
Is the final puzzle re9 the same on all difficulty settings?
The puzzle is mechanically identical on all difficulty settings. The cylinder rotates roughly twenty percent faster on Survivor difficulty, and the projector’s loop is shortened, which reduces the time the player has to read each image. The slot colors, the rejection animation, and the rod pull are unchanged. The harder difficulty does not add a new color, a new slot, or a new input to the sequence.
What is the difference between the two endings triggered by the final puzzle re9?
The two endings differ in roughly forty seconds of closing cinematic footage and one stinger frame after the credits. The “restraint” branch shows the protagonist leaving the facility alone, and the stinger frame shows the antagonist’s research notebook on a desk in a different city. The “spare” branch shows the protagonist leaving with the antagonist, and the stinger frame shows the same notebook with a new entry. The two branches do not unlock different post-game content, different weapons, or different costumes.
Can I see both endings without replaying the entire campaign?
You can see both endings in a single run if you make a manual save right before the rod pull, watch one ending, then reload the save and trigger the alternate state. The in-game save system does not expose a slot for the puzzle room, so console players will need to use the system-level save management. Players who do not want to use manual saves will need to start a New Game Plus run, which takes roughly two hours from a clean carry file.
Why does the cylinder keep rotating during the final puzzle re9?
The cylinder’s rotation is purely cosmetic. It exists to give the room a sense of motion and to mask the loading of the projector’s next frame. The cylinder does not encode a hidden code, does not indicate the order of the slots, and does not gate any input. Players who find themselves staring at the cylinder should look at the slots instead; the cylinder is not part of the puzzle.
Does the final puzzle re9 have a separate achievement or trophy?
There is no achievement or trophy attached specifically to the final puzzle. The two endings each have a single achievement, which is unlocked when the closing cinematic begins. Players who want the achievement for the alternate ending will need to trigger the alternate combined state and pull the rod a second time, either through a manual save reload or a New Game Plus run.
What should I do if the final puzzle re9 soft-locks?
The only soft-lock the puzzle can produce is the player leaving the room with all three slots correctly filled, which resets the puzzle and forces a re-entry. The fix is to re-enter the room, refill the slots, and pull the rod without interacting with the door. There is no other known soft-lock in the current public version, and the development team has confirmed that the puzzle’s gating logic is deterministic and does not depend on frame rate, resolution, or platform.





Leave a Reply